 Plantito
Guide: a house on a sloping block
Most gardens are not flat. This guide shows how to put your house in Plantito and tell it which way your ground slopes, so the 3D view, the sun and shadows, and the amounts for a quote all match your real garden. It takes about five minutes on your phone.
Short on time? Open Places and tap Try an example garden (on a slope). It is a finished garden on a slope you can look around and change.
1. Make your garden
Open Places and tap New garden. Give it a name, such as "Our backyard", and tap Create.
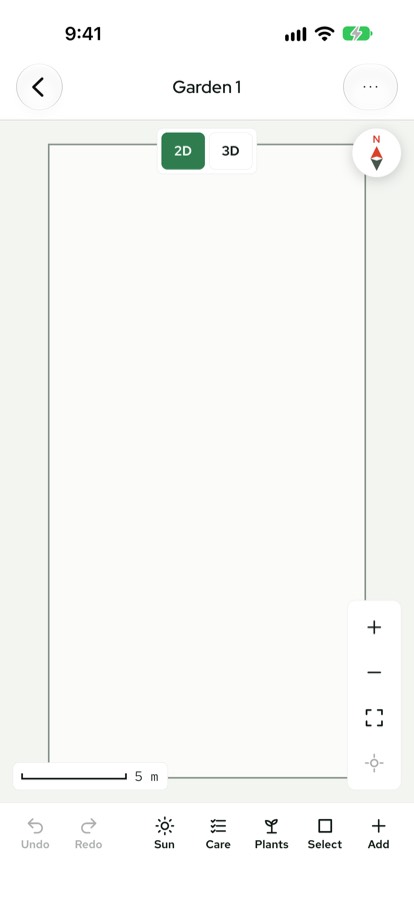
The rectangle you see is your block of land. If yours is not a plain rectangle, tap ⋯ at the top right, then Garden settings, then Change the plot's shape. Drag the round corners to where your fences are. To bend a side, drag the dot in its middle.
2. Put your house in
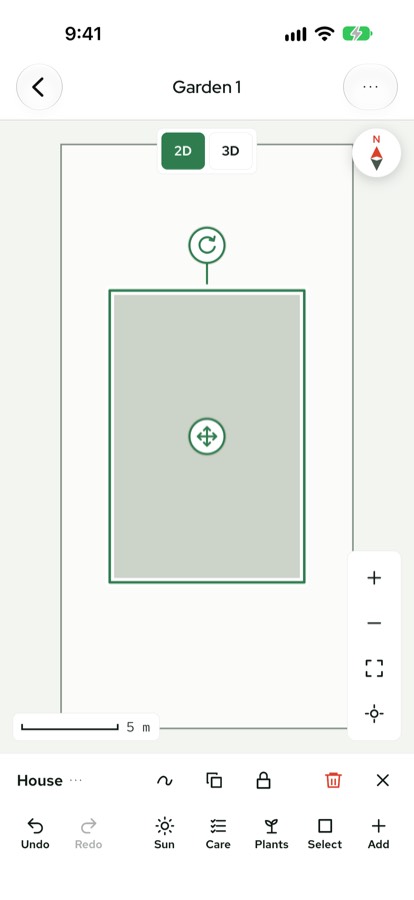
Tap Add, then House. A house appears in the middle of your block (choose L-shaped house if yours is an L).
- Move it: put your finger on the house and drag it to where it really is.
- Change its size: tap the pencil to edit its shape, then drag its corners.
3. Draw the slope
Tap ⋯, then Garden settings, then Draw the slope.
Put your finger on the high side of your garden and drag down to the low side. An arrow shows which way is downhill.
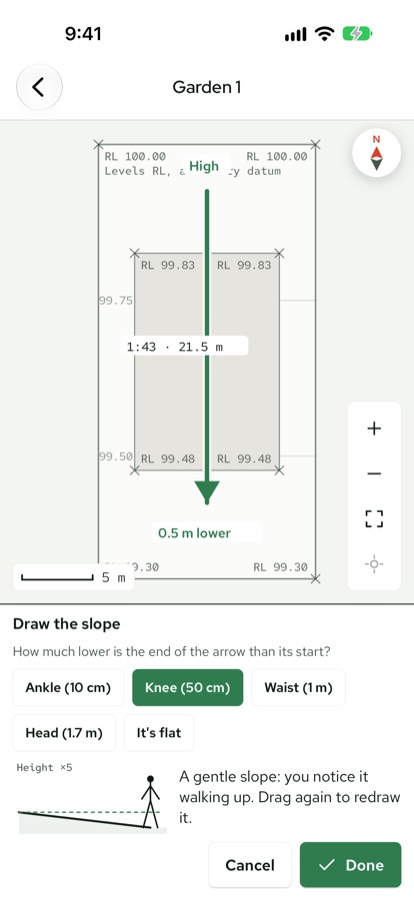
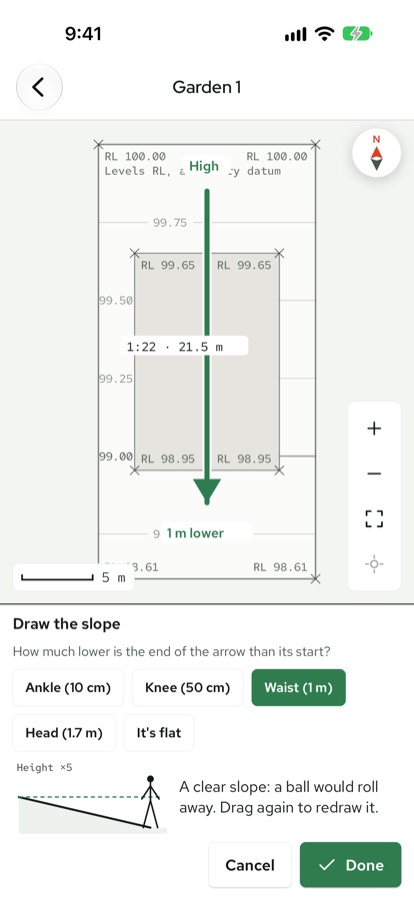
Then tell Plantito how much lower the end of the arrow is. You do not need a tape measure: picture yourself standing at the top of the arrow, and someone standing at the bottom. How far down their body is the ground where you stand?
- Ankle (10 cm): hardly lower at all.
- Knee (50 cm)
- Waist (1 m)
- Head (1.7 m)
Plantito then says how steep that is in words, from "Almost flat: you would hardly notice it" to "Very steep: it wants terraces and retaining walls", shows the slope from the side with a person standing at the low end, and draws height lines across the garden, as a surveyor's plan does: each line joins ground of the same height, and the closer they are, the steeper the ground. The heavier lines carry their level, and each corner of the garden and of the house gets a spot level with a small cross. Levels are written from a made-up starting height of 100.00 at the highest corner ("RL", reduced level), so 99.50 is half a metre lower. The lines stay on the plan afterwards; Height lines in Garden settings hides them. The same drop over a short arrow is steeper than over a long one. Not right? Pick another height, or drag a new arrow. Tap Done when it looks right.
4. See it in 3D
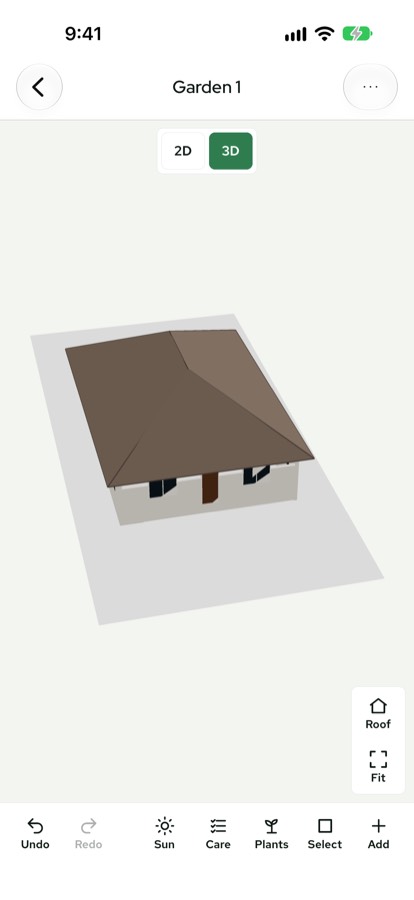
Tap 3D at the top. The ground now tilts the way you drew it, and the house sits on the slope.
- Look around: one finger turns the view; two fingers zoom and slide.
- See inside: tap Roof to lift the roof off and see the plants indoors.
5. Hold the ground up (if you need to)
Where the ground steps down, such as at the edge of a lawn or behind the house, you can add a retaining wall. Tap Add, then Garden wall, choose Retaining, and tap each corner of the wall, then Done. Tap the wall to make it a course higher or lower.
A retaining wall taller than about 1 m usually needs an engineer and your council's approval. Check with your council before you build one.
6. Get a quote
When the garden is ready, open Places, tap ⋯ next to your garden, and choose Share as PDF for a quote (Plantito Plus). It makes a page with your plan, the slope, every plant and the amounts of paving and walls, ready to send to a gardener or landscaper.
Questions
- Which side is high? Water runs downhill: after rain, the low side is where puddles form or water runs off.
- Can I change it later? Yes. Draw a new arrow at any time, or tap It's flat to remove the slope. Undo takes back any step.
- Something not working? Tap Send feedback at the bottom of Places. It comes straight to us.